

Hosted Phone: How to Add or Change On Hold Music
Choose the music or recorded messages callers hear while they are on hold. You will need administrator access to your Execulink Hosted Phone service.
Open Music on Hold
- Sign in to MyExeculink and open Hosted Phone.
- In the Business Group Admin Portal, select Music on Hold (Enhanced) under Services in the left menu.
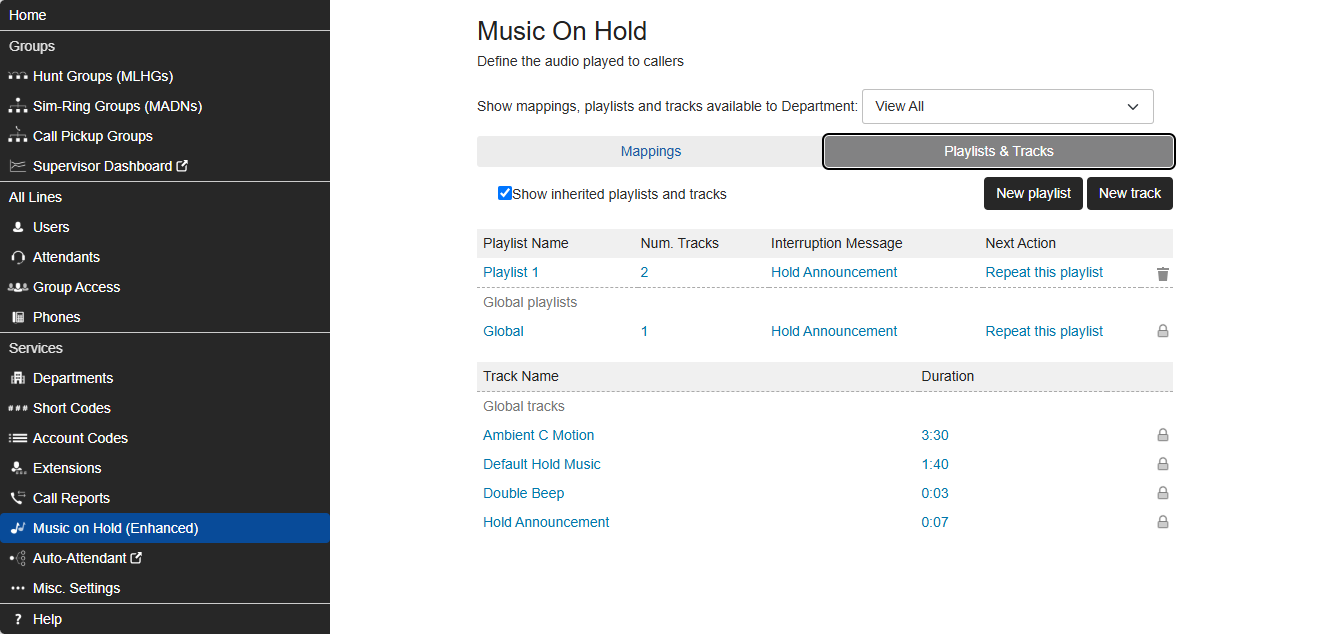
Example screen. Your department, track and playlist names will differ.
Adding new audio? Prepare your file using the steps below, then follow pages 2 to 4.
Using a playlist you already have? Go to page 4 to change a line assignment.
Prepare Your Recording
- Use a WAV (.wav) file, up to 2 MB per track. Convert an MP3 to WAV before uploading it. Renaming the file extension does not convert the audio.
- At each department or the Business Group level, upload up to 50 tracks or 20 MB in total, whichever limit is reached first.
- Across all departments, a Business Group can store up to 1,000 tracks and 1,000 playlists in total.
- Use a short filename with letters and numbers, no more than 48 characters.
See page 5 for the supported WAV formats and audio conversion settings.
Upload a New Recording
- Open Playlists & Tracks, then select New Track.
- Choose the Department and enter a Track Name you will recognize later.
The Track Name must be unique across your Business Group. Do not start or end it with a space, include a forward slash (/) or comma, or use the name None.
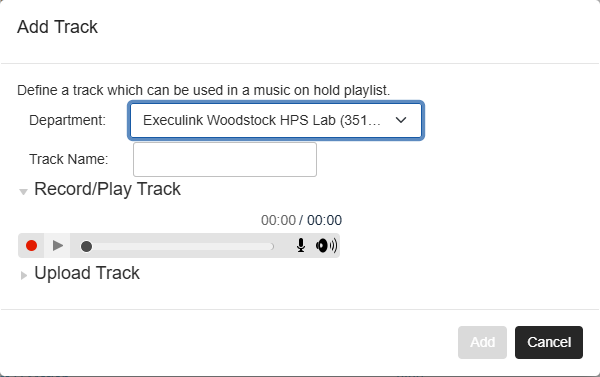
- The Add Track window before expanding Upload Track.
Expand Upload Track. Select Choose File, then choose your WAV recording. - Select Upload. When the upload finishes, select Add to finish adding the track.
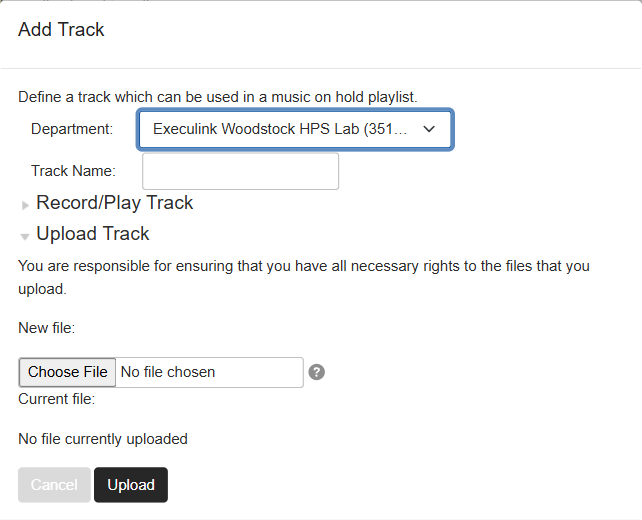
Upload Track expanded. The final Add button is shown in the complete window above.
Next, add your recording to a playlist.
Create a Playlist
A playlist contains the tracks you want callers to hear. Uploading a track alone does not choose which line will use it.
- Under Playlists & Tracks, select New Playlist.
- Choose the Department and enter a Playlist Name.
- Under Select Tracks, choose your recording. To include more recordings, select Add track and choose each additional track. A playlist can contain up to 15 tracks.
- Choose the Start position and the action to take when the playlist is complete. Select Repeat this playlist if you want it to repeat.
- Select Add to create the playlist.
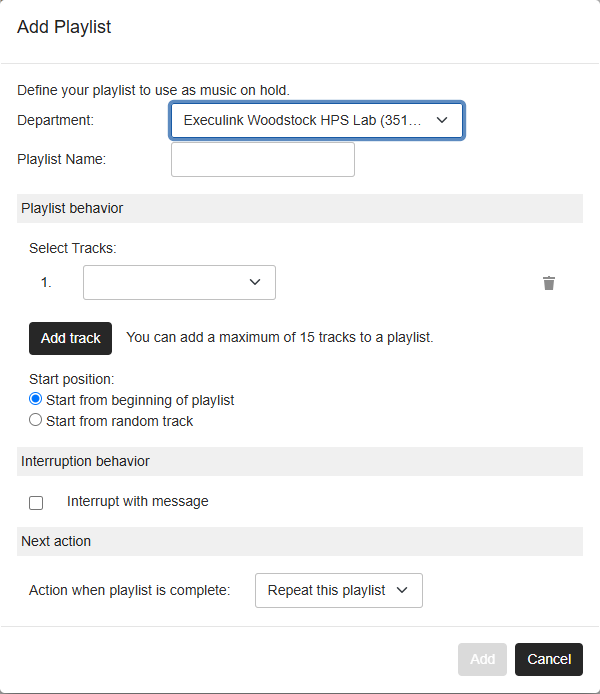
Department playlists can also use tracks from parent departments, the Business Group and the global library. Use the next page to choose where your playlist plays.
Choose Where the Playlist Plays
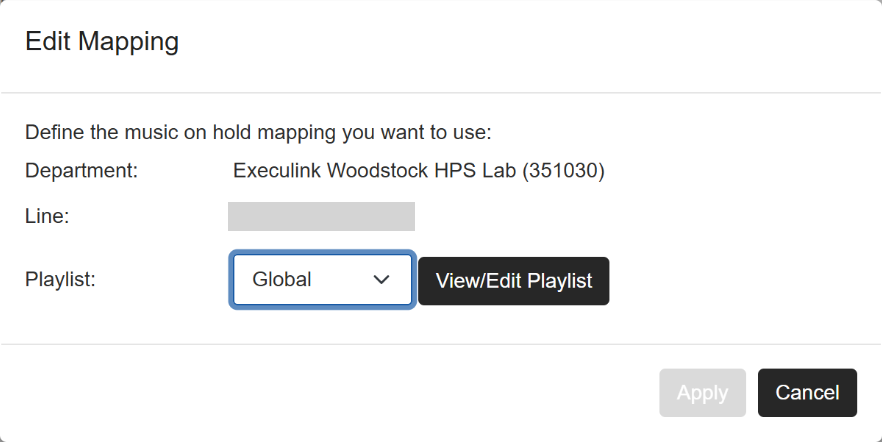
Open Mappings. The Department or Line name column identifies your business, departments and phone lines. Choose the task below.
Change an Existing Line Assignment
- Select the line you want to update under Department or Line name.
- In Edit Mapping, choose the required Playlist, then select Apply.
Add a Business Default Assignment
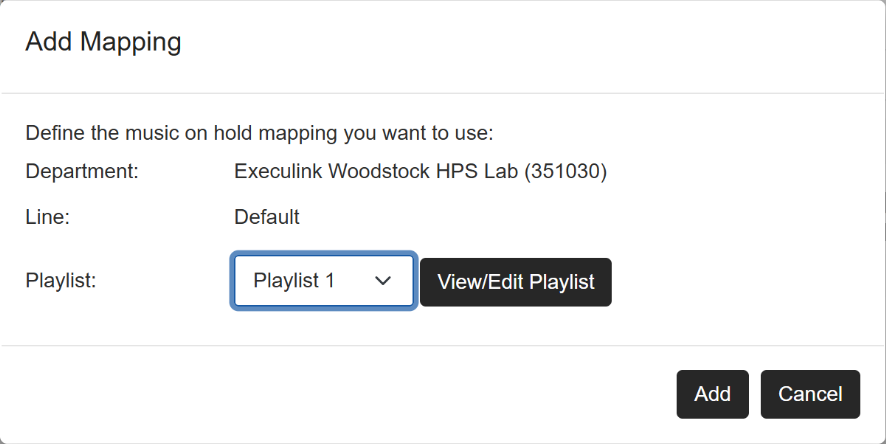
The Default assignment applies to all phones within your business. Use these steps when no default playlist assignment is listed for your business.
- Under Department or Line name, select the entry showing your business name.
- In Add Mapping, check that Line shows Default. Choose your Playlist, then select Add.
Check what callers hear. Call the affected line from another phone and have someone put you on hold so you can listen to the result.
Need help? If a playlist is unavailable or an error appears, contact Account Support at 1-519-456-4803 or accountsupport@execulinktelecom.ca.
WAV Formats and Conversion
Use these settings when preparing your recording for upload. The maximum size for each track is 2 MB.
Supported WAV Formats
| WAV Encoding | Channels | Sample Rates (Hz) |
|---|---|---|
| Microsoft PCM 16-bit, signed, little-endian | 1 or 2 | 44100, 22050 or 16000 |
| Microsoft PCM 8-bit, unsigned | 1 | 22050, 11025 or 8000 |
| Microsoft u-law 8-bit | 1 | 8000 |
Preferred for compatibility: Microsoft u-law 8-bit, one channel, 8000 Hz.
Convert an Audio File to WAV
Audio software such as Audacity can convert your recording to WAV. You can also use an online conversion tool.
Use the Following Settings with the Online Tool:
- Change bit depth: 16 Bit
- Change audio sample rate: 16000 Hz
- Change audio channels: Mono
- Normalize audio: None
- Change PCM format: No change
Save the converted WAV file, check that it is no larger than 2 MB, then follow the upload steps on page 2.