

Managing Access
Phone Manager Access
The primary Account/Phone System Administrator(s) can grant varying levels of access to the Phone Manager for employees within their business.
The Phone Manager can be accessed via a MyExeculink Username and Password, which also grants additional account privileges based on the type of contact (Admin, Billing or Technical). Alternately, it can be accessed by Phone Number and Password, which limits access to just the Phone Manager interface.
This guide will provide details and step by step instructions for granting various levels of access to your employees.
Username Access
The primary Account/Phone System Administrator will access MyExeculink and the Phone Manager via a Username and Password. They can also grant and manage additional employee access to MyExeculink and the Phone Manager.
Prior to granting Username-based Phone Manager access, the employee must be provided with MyExeculink Access and be assigned one of the following access types:
- Admin – This individual would have full administrative privileges and has complete access to the account and can authorize any change.
- Billing – This individual has access to billing-related information, and is characterized by their ability to view and pay bills.
- Technical – Generally responsible for issues of a technical nature, this individual has the authority to interact with Execulink Telecom support staff for matters relating to setup and problem-solving.
Tip: Please refer to the Support Centre Guide MyExeculink – Adding and Managing Contacts for further details regarding the capabilities for each user type, and for assistance in granting their initial My Execulink access.
Granting Username Access
Step 1
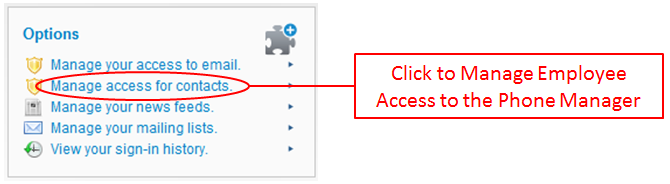
From the ‘Options’ window on the main MyExeculink page, click on ‘Manage access for contacts’.
Step 2
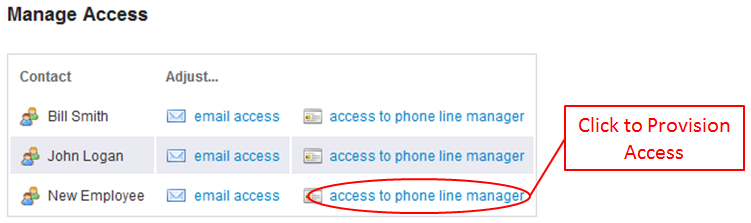
This will display the ‘Manage Access’ window. Click on ‘access to phone line manager’ next to the contact’s name.
Step 3
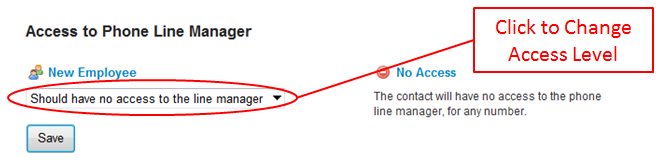
This will display the ‘Access to Phone Line Manager’ window. Click on the drop down list to change this contact’s access level.
Step 4
There will be three available options in the drop down menu (detailed below). You will need to select an option, modify the settings for that option (if applicable), and then click Save.
- Should have no access to the line manager
- This is the default and prevents the contact from accessing the Phone Manager.
- Should have full access to the line manager
- This level of access is intended for other Primary Phone System Administrators as it can grant access to the Administration interface, plus direct access to all lines within your phone system. This offers complete management capabilities and access to all Administrative and Line Features for your Phone System.
- Optional: In addition to being able to access to any line in the Phone System, by default the contact will also be granted access to the Administration Interface. You can toggle access to the Administration interface off by clicking the check box next to ‘And should be restricted from the administration interface’.

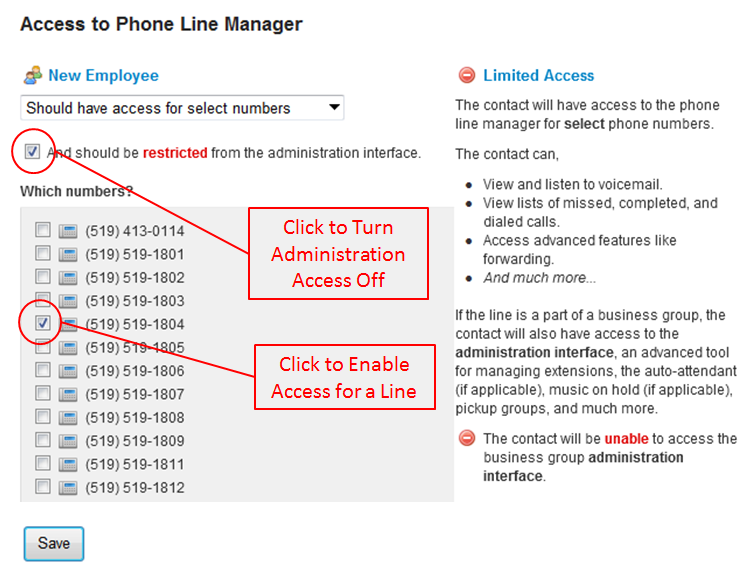
- Should have access for select numbers
- This level of access is intended for the majority of users as it allows you to restrict access to individual lines. This will allow you to grant access to an employee to only manage their personal line/extension without being able to view/manage other lines within your business group.
- Administrative Rights: In addition to being able to access to any line in the Phone System, by default the contact will also be granted access to the Administration Interface. You can toggle access to the Administration interface off by clicking the check box next to ‘And should be restricted from the administration interface’.
Please refer to section ‘Granting Administrative Privileges via the Phone Manager’ within this guide to enable Administrative privileges for a line.
Phone Number Access
You can grant access to the Phone Manager for most of your employees without issuing them a MyExeculink Username. This will prevent them from having the rights to view/change your account information based on a contact type (admin/billing/technical). This is known as direct Phone Number access and will limit the user to only the Phone Manager Interface.
Granting Phone Number Access
Step 1
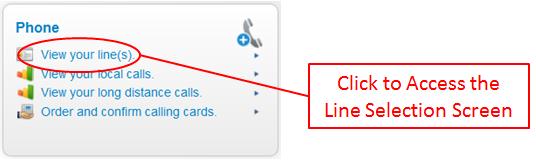
Login to MyExeculink as a Phone Administrator and from the ‘Phone’ window click on ‘View your lines’.
Step 2
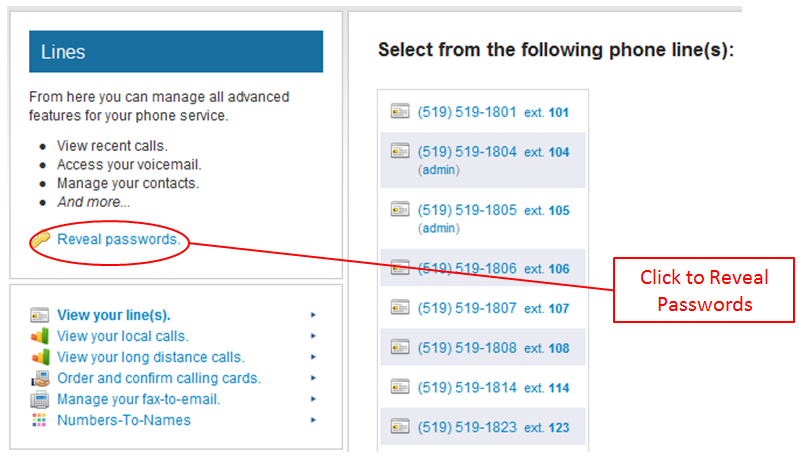
This will display the ‘Line Selection’ screen. Click on ‘Reveal passwords’.
Step 3
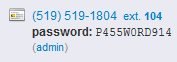
This will display the password for each line.
Step 4
Provide this password to the employee requiring access. They can now login to MyExeculink to manage their Phone Line/Extension via a 10-digit Phone Number and Password. None of the enhanced My Execulink functionality will be available to them.
If the line has been granted Administrative privileges, then the employee can access both the Administrative interface and the Line interface via Phone Number login.
Note: If a password needs to be changed, then please contact the Execulink Support Team for assistance.
Granting Administrative Privileges for a Line
If you wish to grant line access to an employee, and also want to extend Administrative functionality to that person, then their line will need to be assigned with Administrative privileges via the Phone Manager Interface. Doing so will allow the user to log directly into their line, as well as log into the Phone Manager as an Administrator.
Assigning Administrative access for a line
Step 1
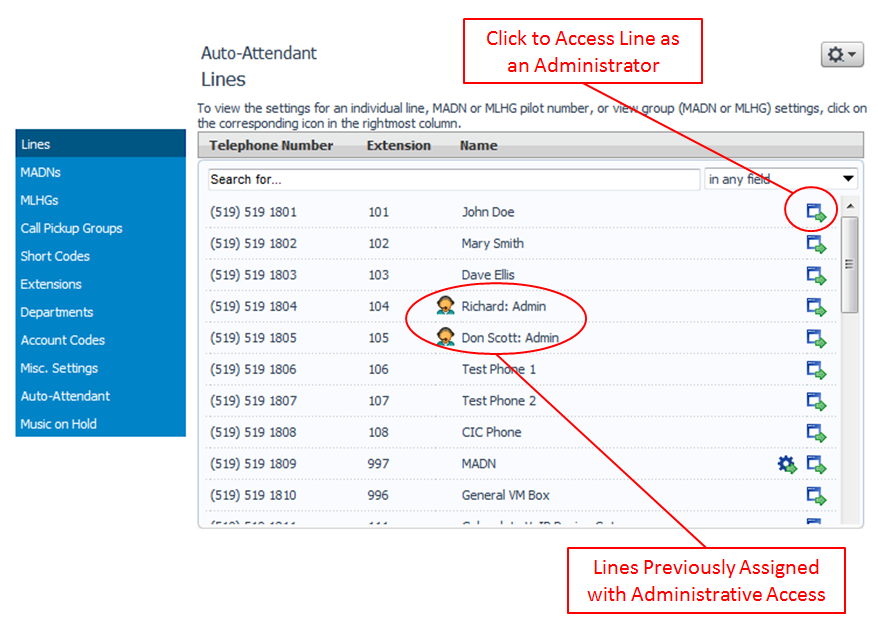
Login to My Execulink as a Phone Administrator and access the Administration interface. Access the line you wish to grant Administrative privileges for.
Step 2
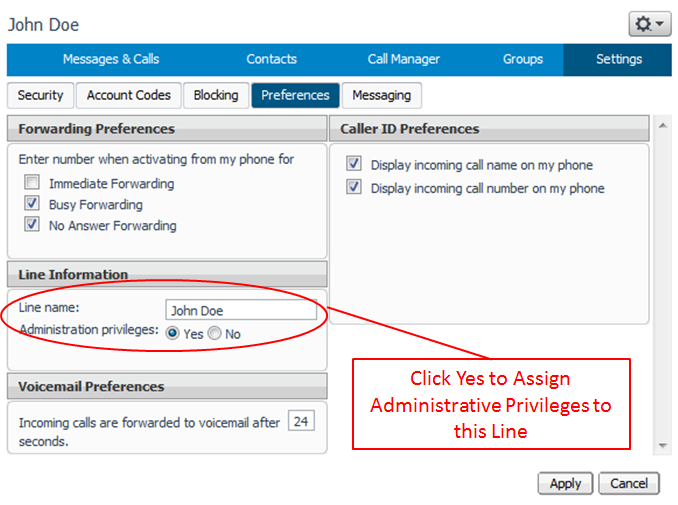
You will now be logged into the line as an Administrator. Go to the ‘Settings’ tab and click the ‘Preferences’ tab. In the ‘Line Information’ section, you will have an option to grant Administrative
privileges for this line. Click ‘Yes’ and then click ‘Apply’ to assign Administrative access for this line.
Note: It will take up to 15 minutes before the Administrator indication displays in the My Execulink ‘View your lines’ section.