
Adding and Managing Contacts
Contact Management
An Account Administrator can login to MyExeculink and has the ability to enable and manage MyExeculink access for other employees.
There are three types of access which may be granted.
- Admin – This individual would have full administrative privileges and has complete access to the account and can authorize any change.
- Billing – This individual has access to billing-related information, and is characterized by their ability to view and pay bills. They will have the following capabilities:
- Obtain billing information.
- Change payment options.
- Modify your billing address.
- Technical – Generally responsible for issues of a technical nature, this individual has the authority to interact with Execulink Telecom support staff for matters relating to setup and problem-solving. The will have the following capabilities:
- Obtain or change usernames or passwords.
- Obtain information for Services on file (IP addresses, Maximum Sessions, Allowed Services, etc.).
- Obtain or change the service address on file.
- Obtain, add or change email forwarding addresses and aliases.
- Open tickets.
Note: If creating a MyExeculink login for an employee who requires Phone Manager access, then any of the above types will be valid.
If an employee requires Phone Manager access in order to manage settings for their personal extension, and you do not wish for them to have My Execulink access, then please refer to the Managing Access guide for further instructions.
Adding a Contact
You will need to be logged into MyExeculink as an Administrator in order to add contacts to your account.
Step 1
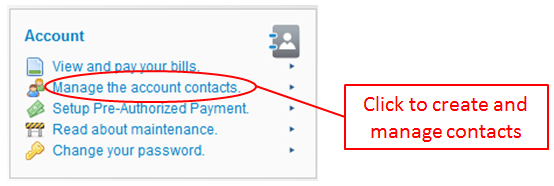
From the main MyExeculink screen, go to Account window and click on Manage the account contacts.
Step 2
The Contacts window will now be open, presenting you with the current contact list for your account. From here you will be able to add and remove contacts, as well as manage News feeds and Email access for eachcontact.
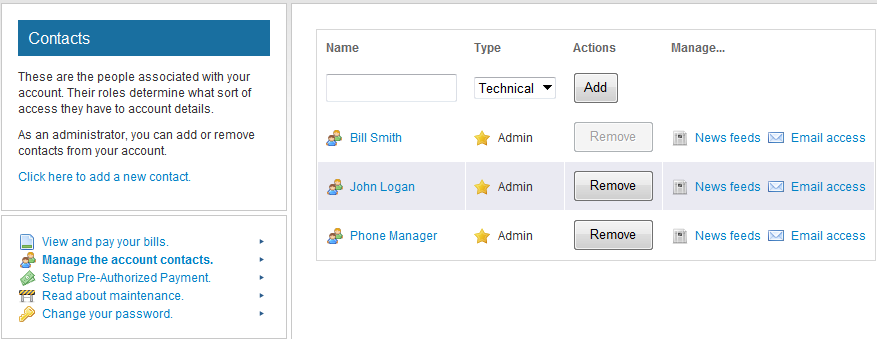
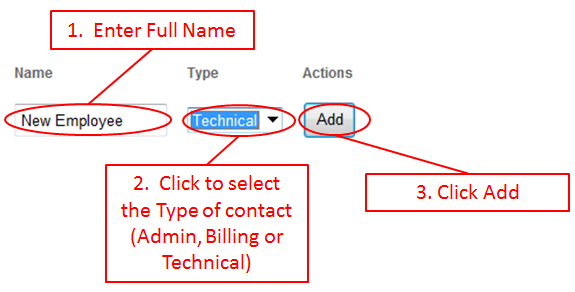
To add a new contact:
1. Enter the Full Name of the contact.
2. Select their user Type from the drop down list.
3. Click the Add button.
Step 3
The New Contact window will now be open, allowing you to add contact details and a set a security question for the contact.
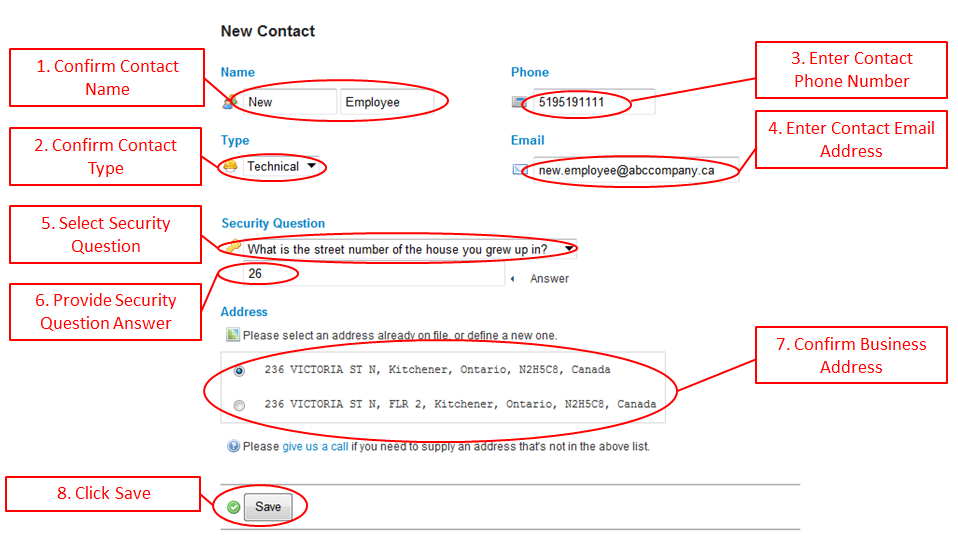
To complete the process to add a new contact:
1. Confirm the First and Last Name of the contact.
2. Confirm their user Type from the drop down list.
3. Enter the contact’s Phone Number.
4. Enter the contact’s Email Address (this is an optional field).
5. Select a Security Question from the drop down list.
6. Enter an Answer to the Security Question.
7. Select the correct Business Address.
8. Click Save.
Step 4
You will now be presented with a unique MyExeculink Username and Password for this contact.
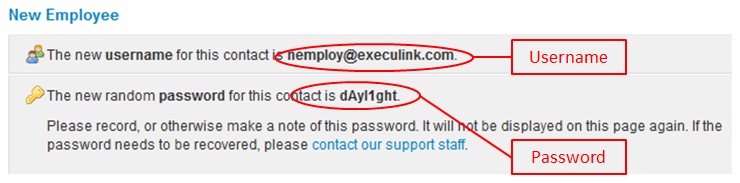
***Make a note of this password, as it will not be displayed again. You will need to contact the Execulink support team if this password cannot be remembered.
Managing Your Contacts
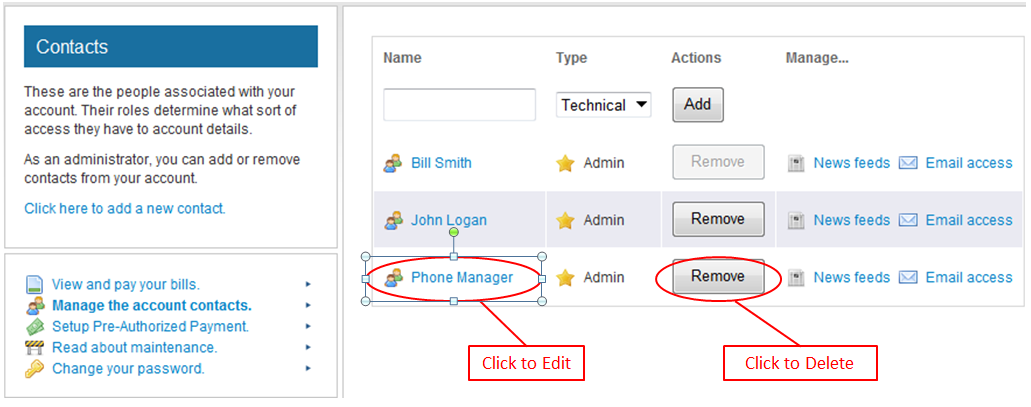
Edit a contact: To edit a contact’s information or to change their type of access, click on the contact’s name from the Contacts Screen.
Delete a contact: To delete a contact, click the Remove button next to their name.